# Creating your first resume (https://docs.hireway.dev/docs/documents/creating-your-first-resume)
This guide takes you from an empty account to a first resume you can download. It takes a few minutes. If you already have a resume as a PDF, Word or JSON file, you can [import it](/docs/documents/importing-resumes) instead of starting blank.
## Before you start [#before-you-start]
You need a Hireway account. If you don't have one yet, see [Creating an account](/docs/account/creating-an-account). Sign in at [hireway.dev](https://hireway.dev), or at your own address if you host Hireway yourself.
## Start a blank resume [#start-a-blank-resume]
After you sign in, you land on **Documents**, the page that lists all your resumes and cover letters. On your first visit it's empty and offers three ways to begin.
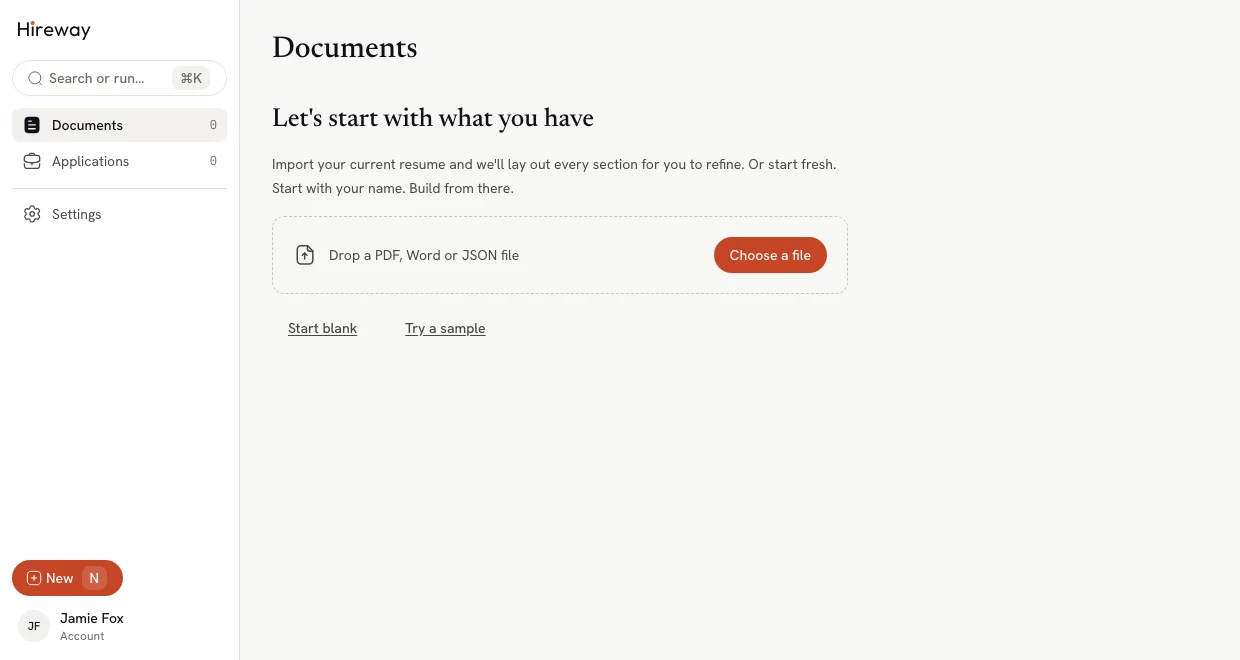 Select **Start blank**. You can also select **New** in the sidebar (or press N) and choose **Start blank** in the **New document** dialog.
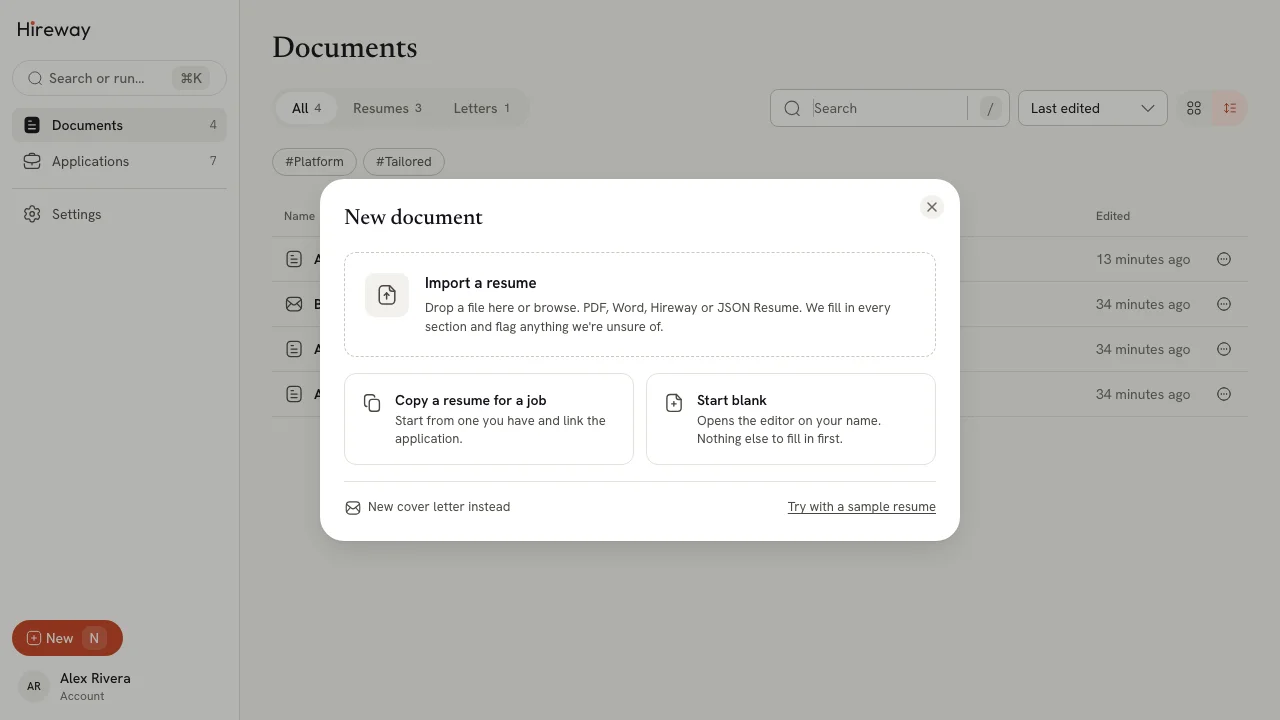 Hireway creates the resume straight away and opens it in the editor. There's no name or address to fill in first.
Want to look around before typing anything? Choose **Try a sample** (or **Try with a sample resume** in the dialog) to
get a filled-in resume you can explore and delete later.
## Add your name and contact details [#add-your-name-and-contact-details]
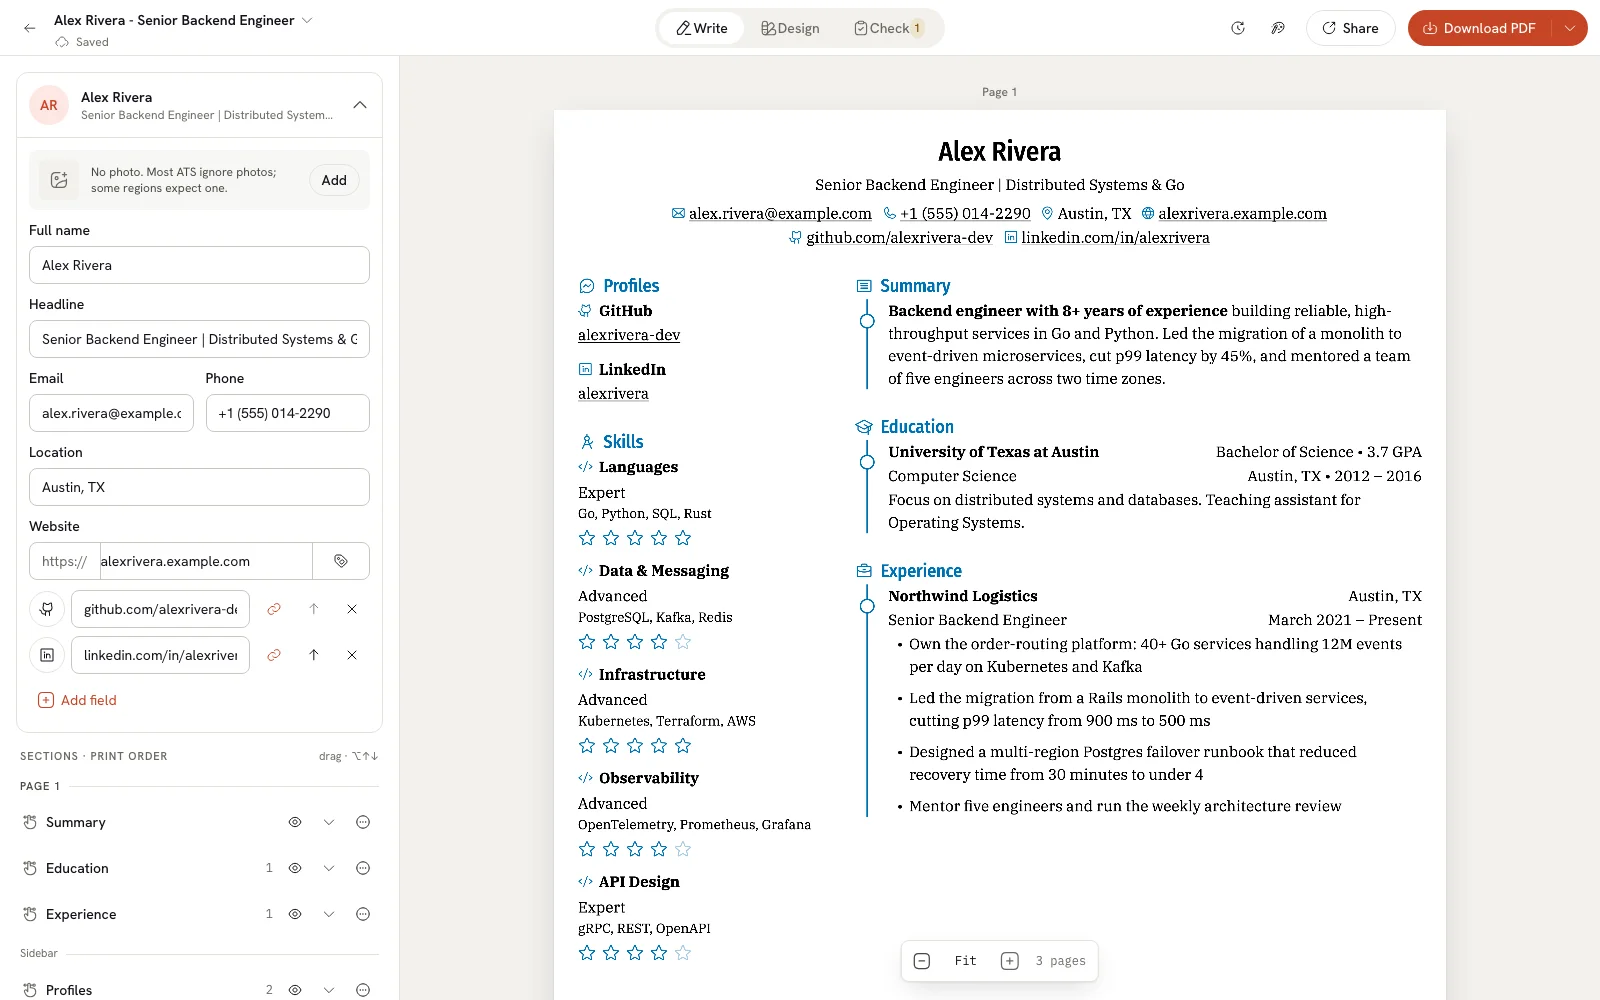
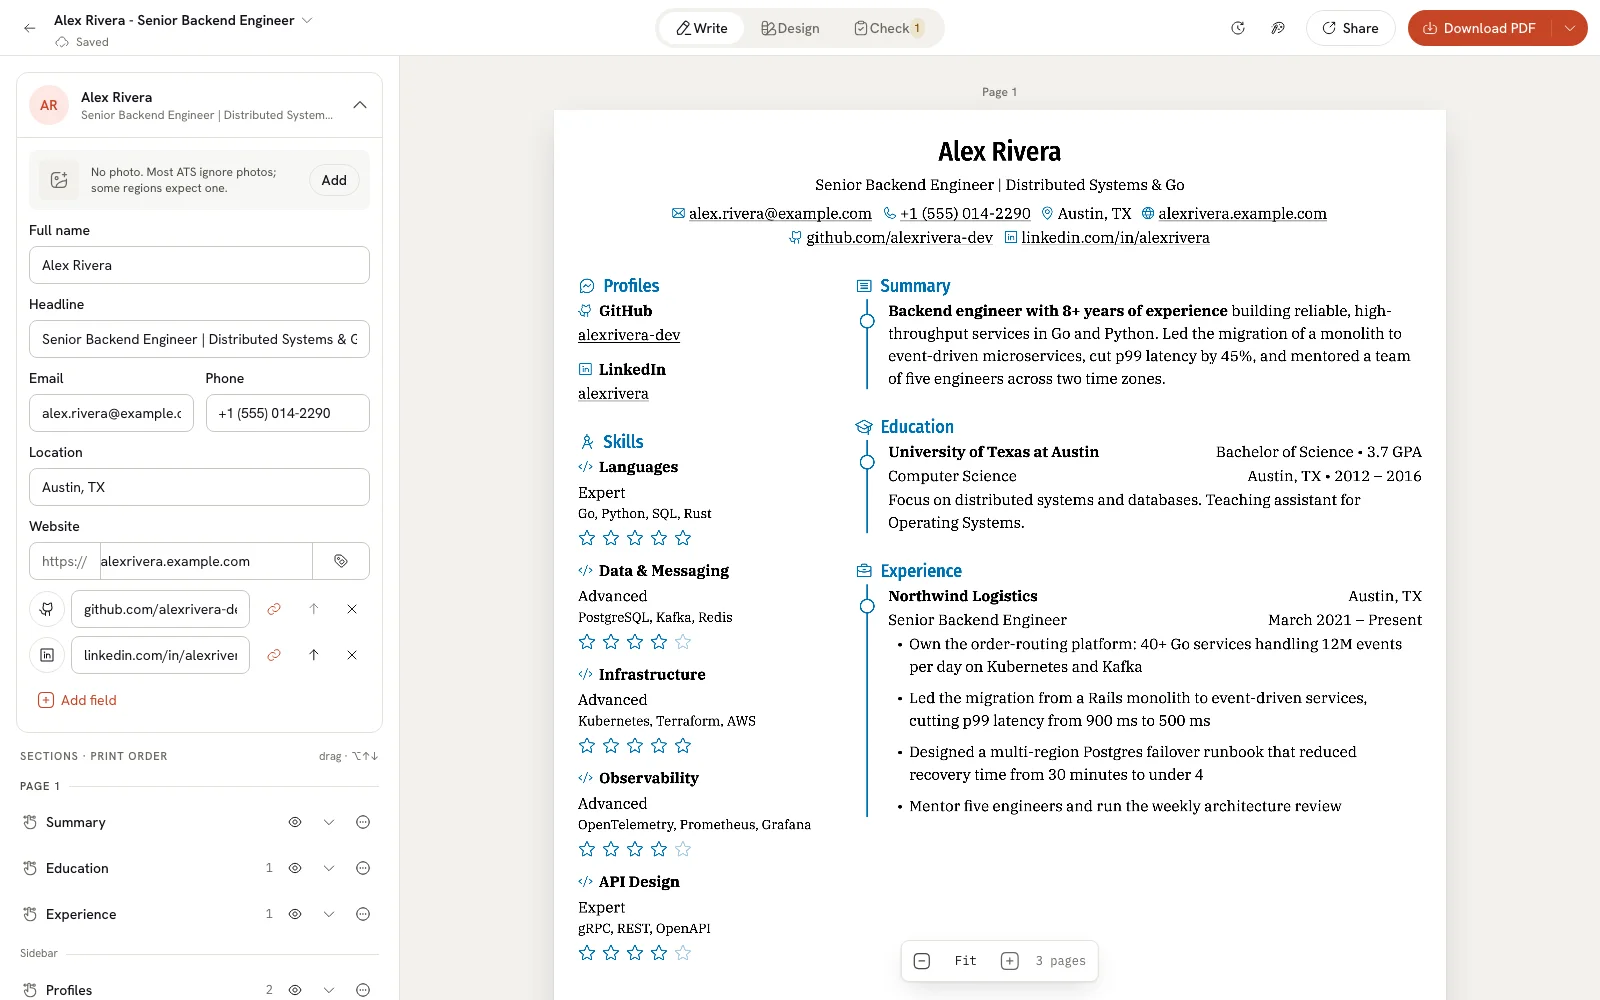
The editor opens in **Write** mode with the cursor in **Full name**. The page on the right updates as you type, and every change saves on its own. The editor bar shows **Saved** under the document name.
Type your **Full name**, then a **Headline** (for example, the job title you're aiming for), your **Email**, **Phone** and **Location**. Add a **Website** if you have one.
A new blank resume is called "Untitled resume". Until you name it yourself, it takes its name from your **Headline**, so it's easy to find later. To pick your own name, open the document name menu at the top left and choose **Rename…**, or rename it from Documents.
Hireway creates the resume straight away and opens it in the editor. There's no name or address to fill in first.
Want to look around before typing anything? Choose **Try a sample** (or **Try with a sample resume** in the dialog) to
get a filled-in resume you can explore and delete later.
## Add your name and contact details [#add-your-name-and-contact-details]
The editor opens in **Write** mode with the cursor in **Full name**. The page on the right updates as you type, and every change saves on its own. The editor bar shows **Saved** under the document name.
Type your **Full name**, then a **Headline** (for example, the job title you're aiming for), your **Email**, **Phone** and **Location**. Add a **Website** if you have one.
A new blank resume is called "Untitled resume". Until you name it yourself, it takes its name from your **Headline**, so it's easy to find later. To pick your own name, open the document name menu at the top left and choose **Rename…**, or rename it from Documents.
 ## Add your first section [#add-your-first-section]
Below your details, under **Sections · print order**, Hireway suggests the sections most resumes have.
## Add your first section [#add-your-first-section]
Below your details, under **Sections · print order**, Hireway suggests the sections most resumes have.
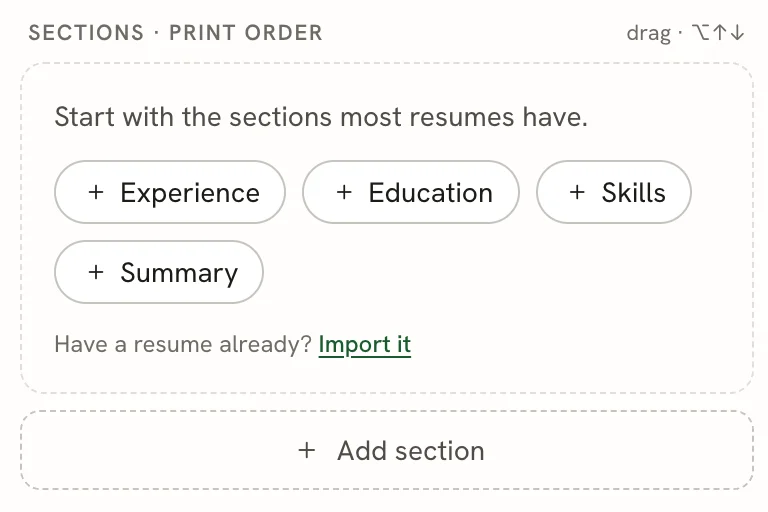 Select **Experience** (or any other suggestion). For anything else, select **Add section**.
The section opens with an empty entry. Fill in **Position** and **Company**, then **Location** and **Dates**. Turn on
**Present** if you still work there. An experience entry appears on the page once it has a company.
Select **Add experience** below the entry for your next job, or add more sections the same way.
Select **Experience** (or any other suggestion). For anything else, select **Add section**.
The section opens with an empty entry. Fill in **Position** and **Company**, then **Location** and **Dates**. Turn on
**Present** if you still work there. An experience entry appears on the page once it has a company.
Select **Add experience** below the entry for your next job, or add more sections the same way.
 ## Download your resume [#download-your-resume]
When you're happy with it, select **Download PDF** in the top right corner of the editor. The arrow next to it opens other formats.
## Download your resume [#download-your-resume]
When you're happy with it, select **Download PDF** in the top right corner of the editor. The arrow next to it opens other formats.
 To come back later, select the arrow at the top left of the editor to return to Documents, where your resume now has its own card.
## Next steps [#next-steps]
Write, Design and Check modes, and what each part of the screen does.
Photo, extra contact fields and a summary.
Change how your resume looks without retyping anything.
Rename, duplicate, lock and organize your resumes.
To come back later, select the arrow at the top left of the editor to return to Documents, where your resume now has its own card.
## Next steps [#next-steps]
Write, Design and Check modes, and what each part of the screen does.
Photo, extra contact fields and a summary.
Change how your resume looks without retyping anything.
Rename, duplicate, lock and organize your resumes.