# Quickstart (https://docs.hireway.dev/docs/getting-started/quickstart)
In this tutorial you'll create a Hireway account, open a sample resume, put your own name on it, try a different
template and download it as a PDF. It takes about ten minutes, and at the end you'll know your way around the editor.
You only need a web browser. The steps use [hireway.dev](https://hireway.dev).
## 1. Create your account [#1-create-your-account]
Go to [hireway.dev/auth/register](https://hireway.dev/auth/register).
Enter your **Name**, a **Username**, your **Email Address** and a **Password**, then select **Sign up**. If you'd
rather use an existing Google, GitHub or other account, pick it below the form instead.
Hireway sends you an email to verify your address. Verifying is optional, but you need it to reset a forgotten
password. Select **Continue** to carry on now and verify later.
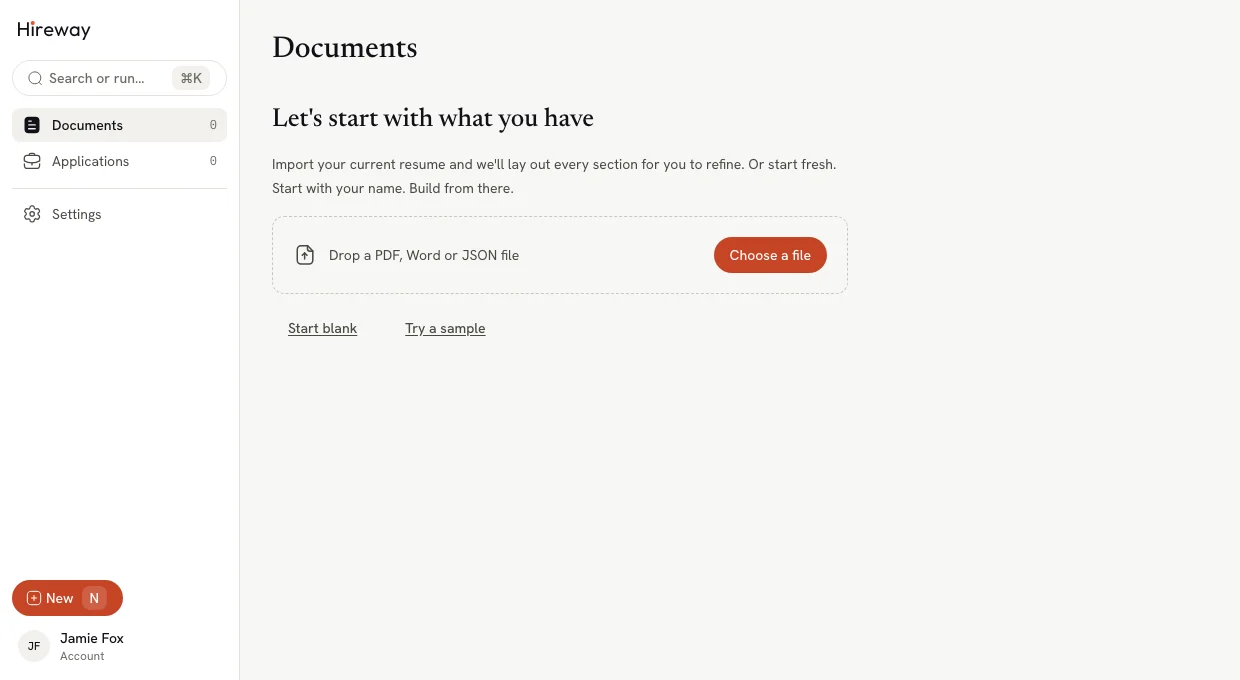
You land on **Documents**, the home page that holds all your resumes and cover letters. It's empty for now.
 ## 2. Open the sample resume [#2-open-the-sample-resume]
Select **Try a sample**. Hireway creates a complete resume for a game developer and opens it in the editor.
Starting from the sample lets you see what a finished resume looks like before you replace its content with yours.
The editor has two halves:
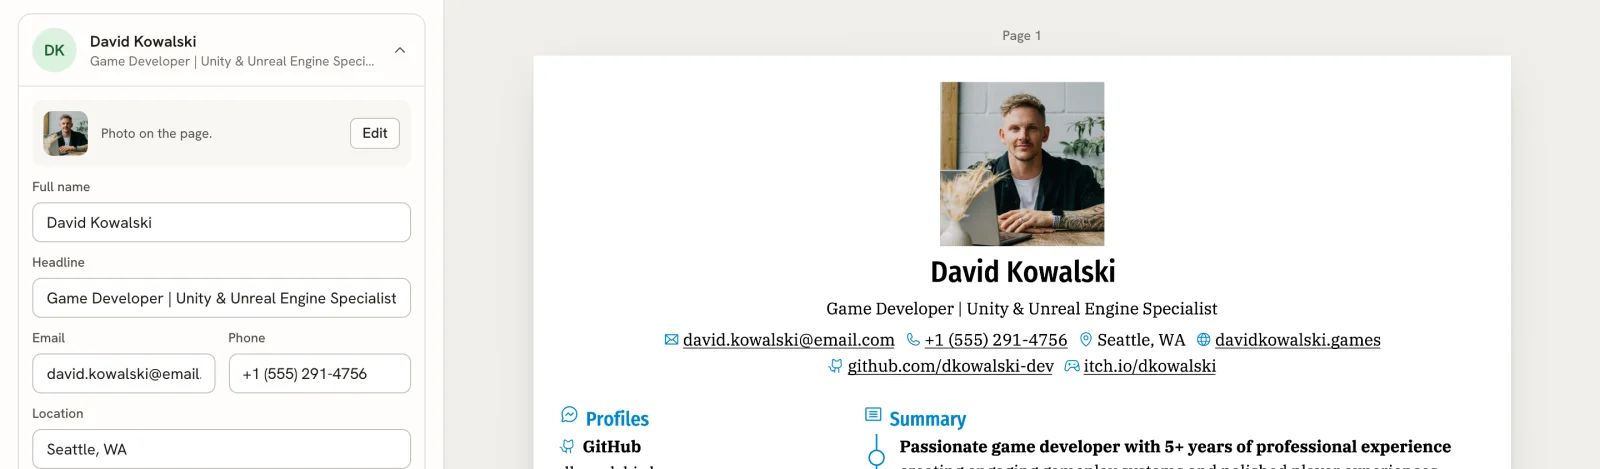
- **The panel** on the left, where you write. It starts with the **Basics** card (your name and contact details),
followed by your sections, such as Summary, Education and Experience.
- **The page** on the right, which shows exactly what your PDF will look like. It updates as you type.
The sample's document name and the name on the resume are a random three-word phrase, such as "Slippery Blush
Marlin". You'll fix both next.
## 3. Name your document [#3-name-your-document]
The document name is only for you; it's how you find the resume in **Documents**.
Select the document name at the top left of the editor.
Select **Rename…**, type a name such as "Game Developer Resume" in **Name**, then select **Save Changes**.
## 4. Put your name on the page [#4-put-your-name-on-the-page]
In the **Basics** card, replace the text in **Full name** with your own name.
The name at the top of the page changes as you type. Try changing **Headline** to the job title you want too.
## 2. Open the sample resume [#2-open-the-sample-resume]
Select **Try a sample**. Hireway creates a complete resume for a game developer and opens it in the editor.
Starting from the sample lets you see what a finished resume looks like before you replace its content with yours.
The editor has two halves:
- **The panel** on the left, where you write. It starts with the **Basics** card (your name and contact details),
followed by your sections, such as Summary, Education and Experience.
- **The page** on the right, which shows exactly what your PDF will look like. It updates as you type.
The sample's document name and the name on the resume are a random three-word phrase, such as "Slippery Blush
Marlin". You'll fix both next.
## 3. Name your document [#3-name-your-document]
The document name is only for you; it's how you find the resume in **Documents**.
Select the document name at the top left of the editor.
Select **Rename…**, type a name such as "Game Developer Resume" in **Name**, then select **Save Changes**.
## 4. Put your name on the page [#4-put-your-name-on-the-page]
In the **Basics** card, replace the text in **Full name** with your own name.
The name at the top of the page changes as you type. Try changing **Headline** to the job title you want too.
 You don't need to save. Under the document name, the status changes to **Saving…** and then **Saved**.
Made a mistake? Press ⌘ Z (Ctrl Z on Windows and Linux) to undo it.
## 5. Try another template [#5-try-another-template]
Select **Design** at the top of the editor, or press 2.
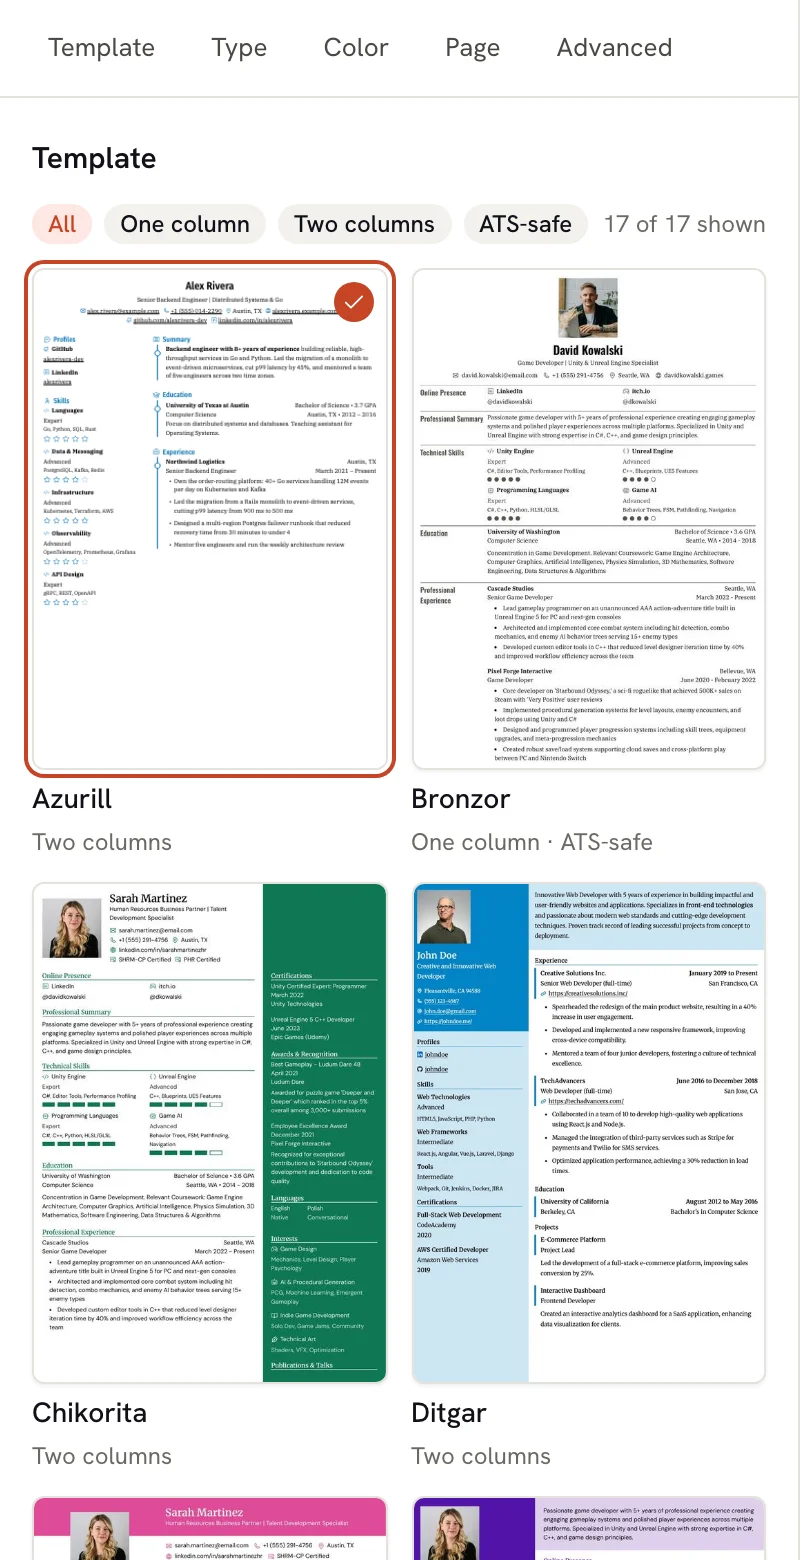
**Template**, at the top of Design, shows all 17 templates filled with your own content. Select one, such as
**Bronzor**, and the page switches to it. Your content stays the same; only the look changes.
Select **Write**, or press 1, to return to your content.
You don't need to save. Under the document name, the status changes to **Saving…** and then **Saved**.
Made a mistake? Press ⌘ Z (Ctrl Z on Windows and Linux) to undo it.
## 5. Try another template [#5-try-another-template]
Select **Design** at the top of the editor, or press 2.
**Template**, at the top of Design, shows all 17 templates filled with your own content. Select one, such as
**Bronzor**, and the page switches to it. Your content stays the same; only the look changes.
Select **Write**, or press 1, to return to your content.
 ## 6. Download your PDF [#6-download-your-pdf]
Select **Download PDF** at the top right of the editor. Your browser saves the file, named after the name on your
resume (for example, `David-Kowalski-Resume.pdf`).
Open the PDF. It matches the page you saw in the editor.
## 6. Download your PDF [#6-download-your-pdf]
Select **Download PDF** at the top right of the editor. Your browser saves the file, named after the name on your
resume (for example, `David-Kowalski-Resume.pdf`).
Open the PDF. It matches the page you saw in the editor.
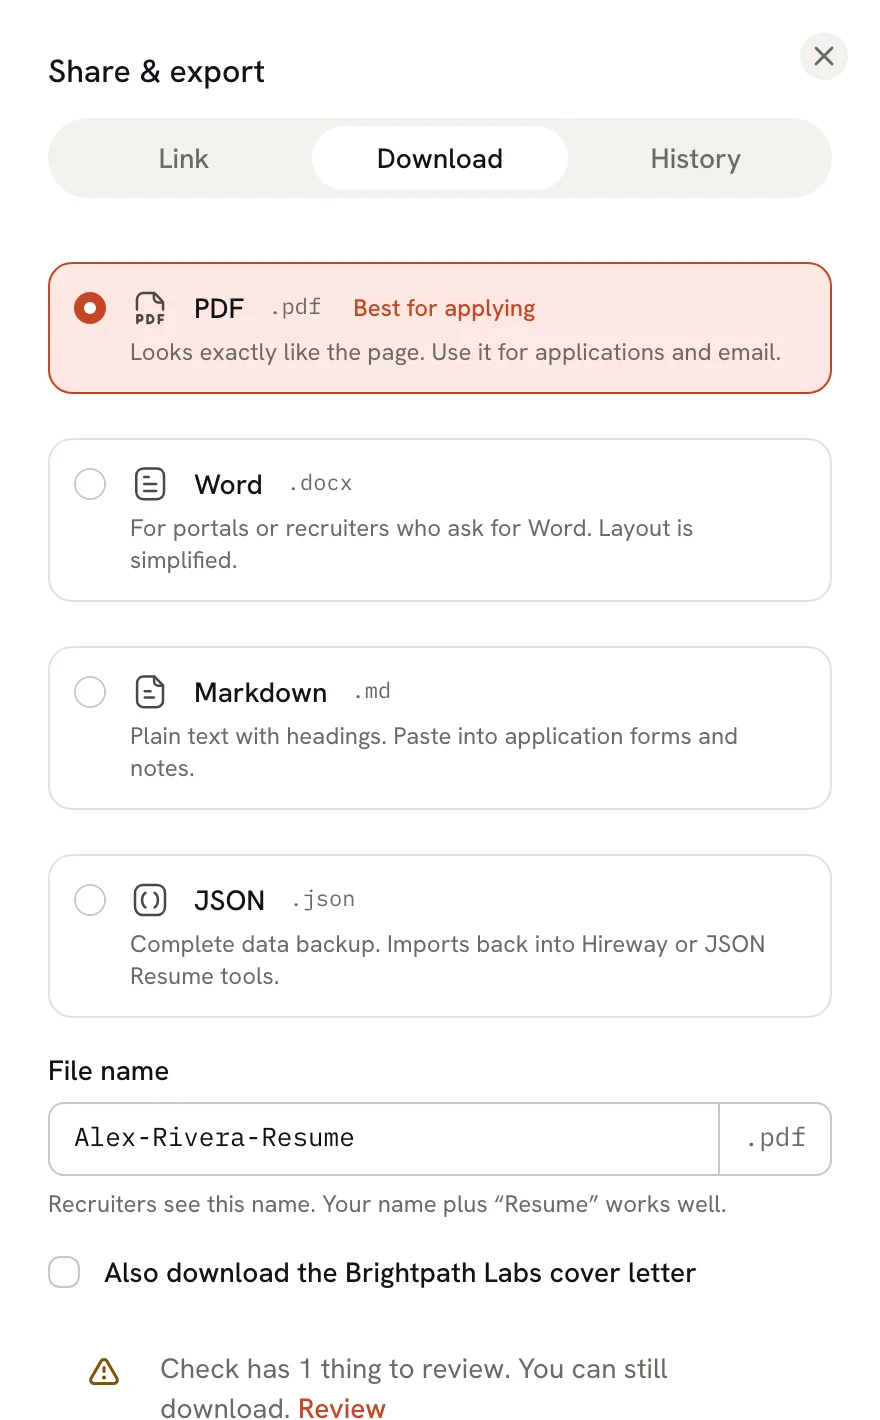
 To download a different format, select the arrow next to **Download PDF**. The **Share & export** panel opens on its
**Download** tab, where you can choose **PDF**, **Word**, **Markdown** or **JSON** and change the file name.
To download a different format, select the arrow next to **Download PDF**. The **Share & export** panel opens on its
**Download** tab, where you can choose **PDF**, **Word**, **Markdown** or **JSON** and change the file name.
 ## What you've done [#what-youve-done]
You created an account, built a resume from the sample, made it yours, tried a template and downloaded a PDF. From
here, replace the rest of the sample with your own experience, or start a fresh resume from **New** in the sidebar
(press N).
## Next steps [#next-steps]
Start from scratch, or import the resume you already have.
Learn the editor bar, the three modes and the page view.
Fix the issues Check finds and compare your resume with a job posting.
Publish a link that recruiters can open in their browser.
## What you've done [#what-youve-done]
You created an account, built a resume from the sample, made it yours, tried a template and downloaded a PDF. From
here, replace the rest of the sample with your own experience, or start a fresh resume from **New** in the sidebar
(press N).
## Next steps [#next-steps]
Start from scratch, or import the resume you already have.
Learn the editor bar, the three modes and the page view.
Fix the issues Check finds and compare your resume with a job posting.
Publish a link that recruiters can open in their browser.