

Choosing colors
Pick an accent color for your resume headings and icons, check its contrast, and change the text, background and skill level styles.
Your resume uses one accent color for headings, icons and colored bands such as a template's header or sidebar. Body text stays near-black so it prints well and reads cleanly in applicant tracking systems. This guide shows how to choose the accent, check that it's readable, and adjust the other colors and the level indicators.
Pick an accent color
Open Color
In the editor, select Design (or press 2), then select Color in the row of links at the top of the panel.
Choose a swatch
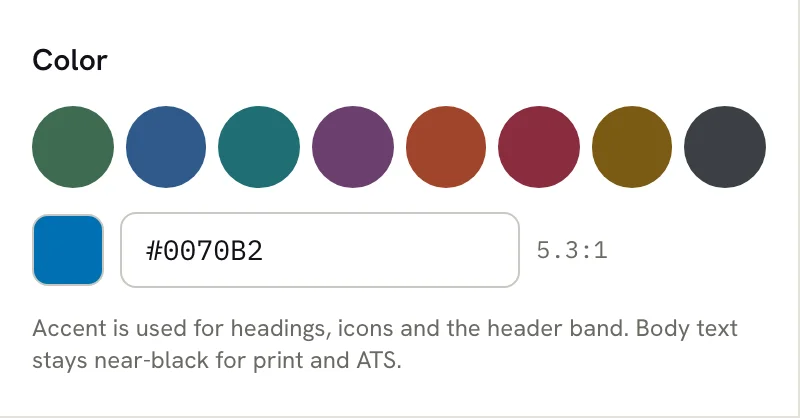
Select one of the eight swatches: Moss, Ink blue, Teal, Plum, Rust, Burgundy, Ochre or Graphite. Hover over a swatch to see its name. All eight are dark enough to read on white.
Use your own color
Type a six-digit hex code, such as #1F6E73, in the field under the swatches. The # is optional. The page updates as soon as the code is complete, and the square on the left shows the color.
Next to the field is the color's contrast ratio against white. Headings need at least 4.5:1 to read comfortably. Below that, the ratio turns amber and a warning appears:
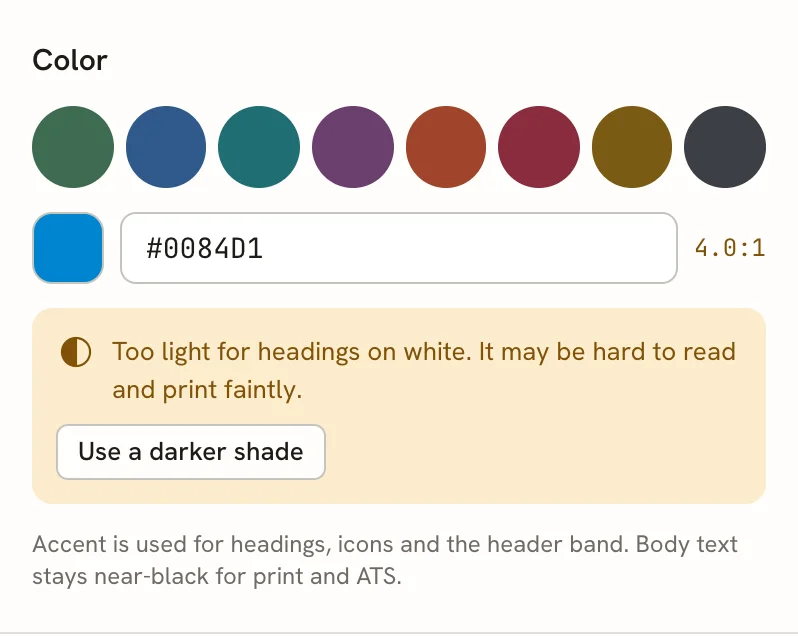
Select Use a darker shade to keep the same hue but darken it until it reads well on white (at least 4.6:1).
Change text and background colors
The Color group only sets the accent. For the other colors, open Advanced at the bottom of the Design panel and find its Design section:
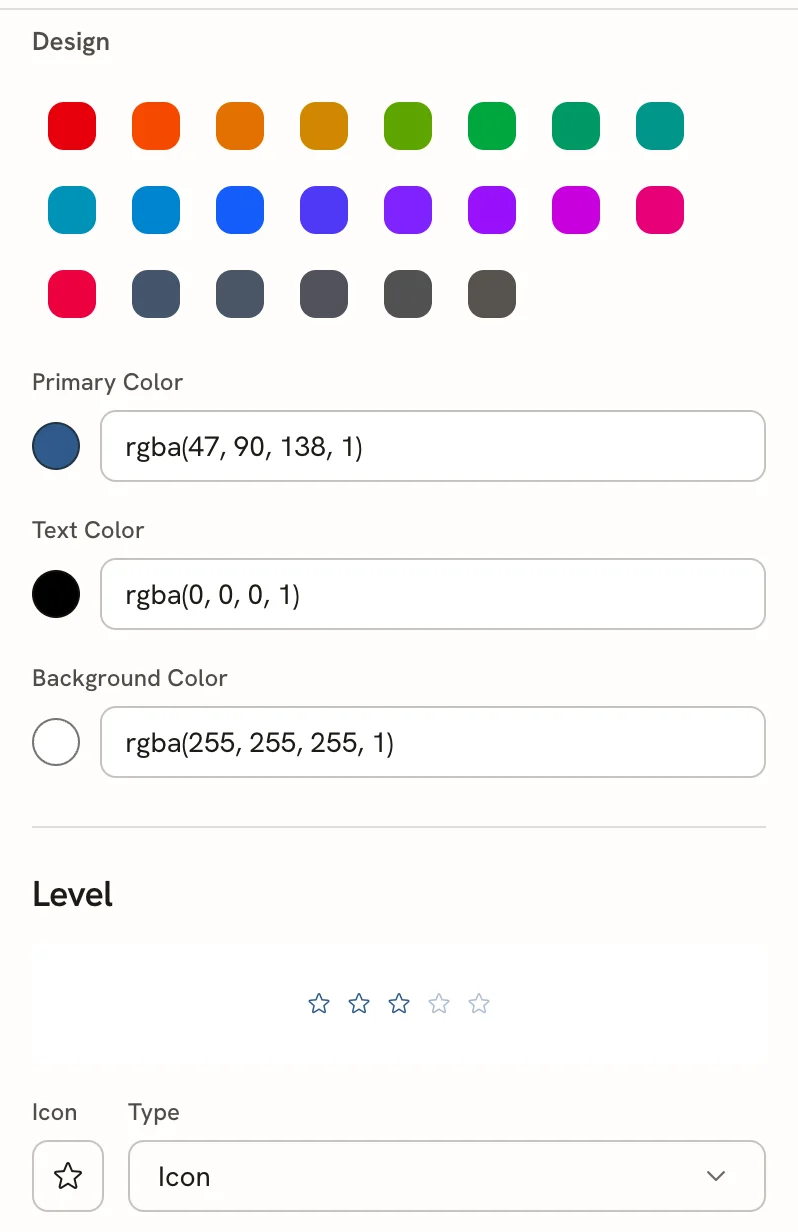
- The row of 22 swatches sets the accent (primary) color. These include bright colors that may not pass the contrast check.
- Primary Color is the accent.
- Text Color is the color of body text.
- Background Color is the page color.
Each has a color picker (the circle) and a text field that shows the value in the form rgba(47, 90, 138, 1). Use the picker, or type a new value in the same form.
Colored or dark backgrounds, and light text, can be hard to read when printed and may confuse some applicant tracking systems. The contrast check in the Color group doesn't look at these fields.
Change how skill levels look
Skills and languages can show a level, for example 4 out of 5. Under Level in Advanced → Design, choose how every level on your resume is drawn. The preview above the controls shows level 3 in your accent color.
| Type | Looks like |
|---|---|
| Hidden | No level is shown. |
| Circle | Filled and empty dots. |
| Square | Filled and empty squares. |
| Rectangle | Short bars. |
| Rectangle (Full Width) | Bars that stretch across the column. |
| Progress Bar | One continuous bar. |
| Icon | A repeated icon, such as a star. Choose it with the Icon button. |
You set each entry's level while writing it; see Editing entries.
Cover letters have the same Color controls in their own Design mode. See Writing a cover letter.
Related guides
- Customizing typography: fonts, size and density.
- Choosing a template: templates decide where the accent appears.
- Checking your resume: find readability issues before you apply.
Customizing typography
Choose a font pairing, text size and density for your resume, or pick any of about 500 fonts with exact sizes, weights and line height.
Choosing paper size, margins and language
Set your resume to Letter, A4 or free-form, choose margins, set the language for section titles and dates, and toggle icons and link underlines.