

Getting to know the resume editor
A tour of the Hireway editor: the editor bar, the Write, Design and Check modes, the page canvas, autosave, and locking a resume.
The editor is where you write and shape a resume. This page explains what each part of it does, how your work is saved, and how to lock a finished resume so it doesn't change by accident.
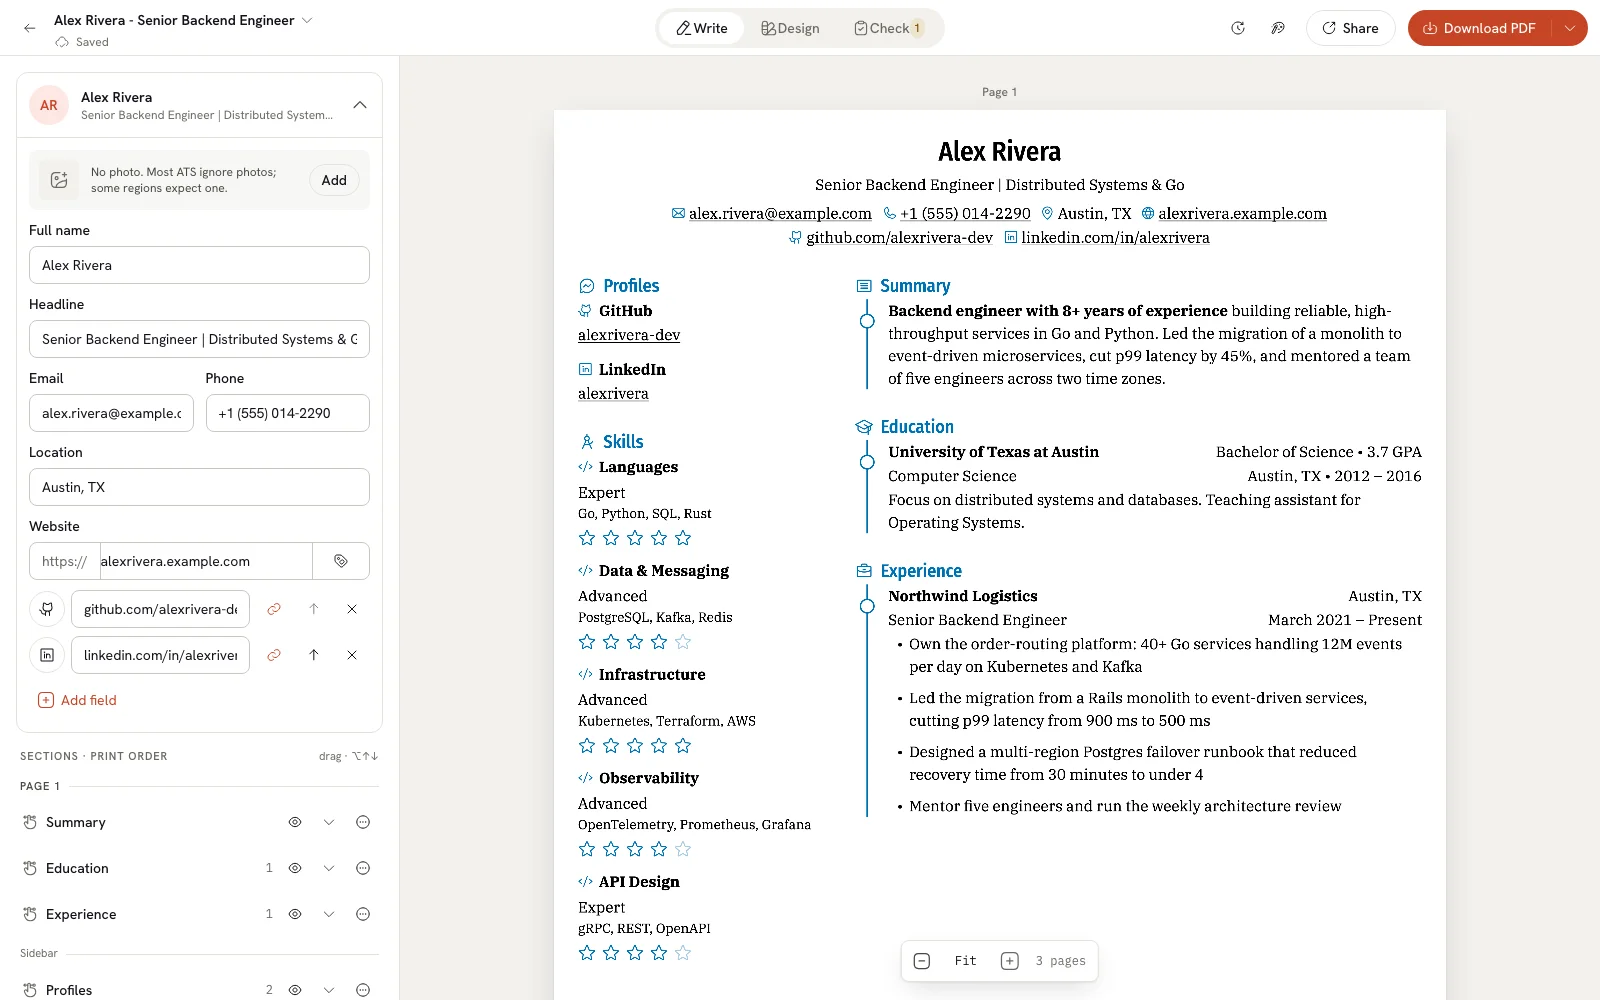
The editor has three parts:
- The editor bar across the top, with the document name, the mode switcher and actions such as Share and Download PDF.
- The panel on the left. What it shows depends on the mode you're in.
- The page canvas on the right. It shows your resume exactly as it will print and updates as you type.
To leave the editor, select the back arrow (Back to documents) at the far left of the bar.
The editor bar

From left to right:
| Part | What it does |
|---|---|
| Back arrow | Returns to your Documents. Any unsaved changes are saved first. |
| Document name | Opens the document menu (see below). Under the name is the save status. |
| Write · Design · Check | Switches the panel between modes. Check shows how many issues are open, or a check mark when there are none. |
| History (clock icon) | Opens the History tab of the Share sheet, where you can see and restore earlier versions. |
| Assistant (sparkle icon) | Opens or closes the AI assistant. |
| Share | Opens the Share sheet on its Link tab. When the resume is public, the button also shows a Public badge. |
| Download PDF | Downloads the resume as a PDF straight away. The arrow next to it (More download formats) opens the Download tab with every other format. |
On narrower screens some buttons show only their icon, and History moves into the Share sheet. See Editing on a phone or tablet.
The document menu
Select the document name to open the document menu.
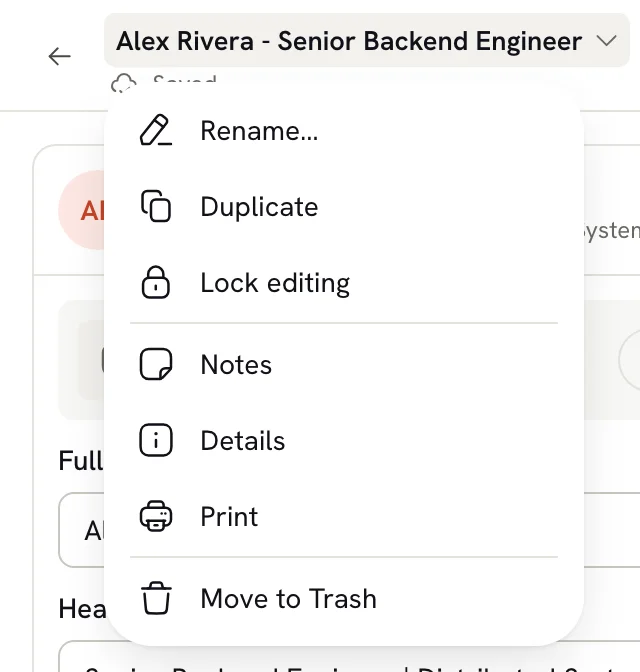
| Item | What it does |
|---|---|
| Rename… | Changes the resume's name and tags. |
| Duplicate | Makes a copy of the resume. |
| Lock editing / Unlock editing | Makes the resume read-only, or editable again. See Locking a resume. |
| Notes | Opens your private notes for this resume. See Using private notes. |
| Details | Shows when the resume was created and last edited, its template, language, length in pages and whether it's shared. |
| Prepares the PDF and opens your browser's print dialog. | |
| Move to Trash | Moves the resume to Trash and takes you back to Documents. A message offers Undo, and the resume stays in Trash for 30 days. See Using the trash. |
The three modes
The mode switcher in the middle of the bar changes what the panel shows. The page stays in view in every mode.
- Write is for content: your name and contact details, the summary, and every section and entry. See Filling in your details and Managing sections.
- Design is for the look of the page: template, fonts, colors, page format and layout. See Choosing a template.
- Check reviews the resume for problems, and can compare it with a job posting. See Checking your resume.
When you're not typing in a field, press 1, 2 or 3 to switch to Write, Design or Check. The mode is part of the page address, so reloading the page or opening a bookmark keeps you in the same mode.
The page canvas
The page on the right is a live preview of the PDF you'll download. Each page has a label above it, such as Page 1.
- Click a line on the page to edit it. Hovering over the page tints the block under the pointer. Clicking it selects that entry, marks it with an Editing tag, and opens it in the Write panel. Clicking your name or contact details opens the Basics card. Press Esc to clear the selection.
- Proposed edits from the assistant or from Check appear on the page, with old text struck through and new text highlighted. Nothing changes until you accept them.
- Overflow warning. If your content runs onto an extra page, the label above the first page says so, for example "Runs onto page 2 by about 6 lines", and offers Fit to one page. See Fitting content on a page.
Zooming
A small zoom bar floats at the bottom of the canvas.
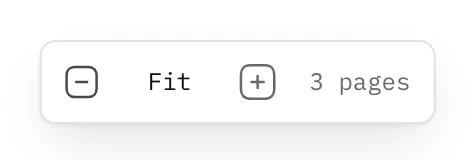
- Select − or + to zoom out or in, in 10% steps from 60% to 150%.
- Select the middle button to fit the page to the width of the canvas. It reads Fit when the page is fitted, and the zoom level otherwise. You can also press ⌘ 0 (Ctrl 0 on Windows and Linux).
- The number on the right is how many pages the resume has.
Zoom only changes what you see in the editor. It has no effect on the PDF or any other download.
How your work is saved
Hireway saves as you type. There is no save button. Changes are sent about half a second after you stop typing, and the status under the document name tells you where things stand:
| Status | Meaning |
|---|---|
| Saved | Everything you see is saved to your account. |
| Saving… | Your latest change is on its way. |
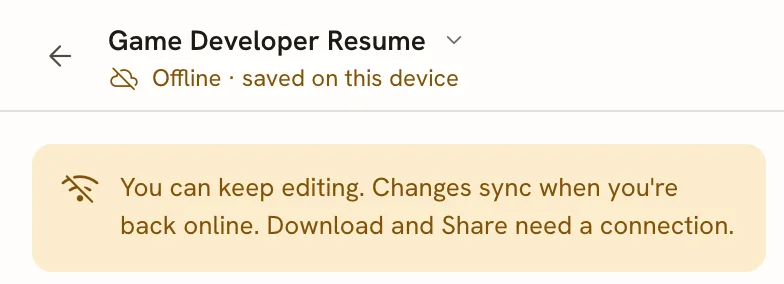
| Offline · saved on this device | You've lost your connection. Your changes are kept in this browser and sent when you're back online. |
| Not saved · Retry | The server couldn't save your changes. They're kept in this browser. Select Retry to try again. |
A few things to know:
- You can keep editing offline. A notice at the top of the panel explains that changes sync when you're back online. Share and Download PDF are unavailable until then.
- Unsaved changes survive a reload or a closed tab. If you come back to a resume whose last changes never reached the server, the editor restores them and says "Restored changes that hadn't been saved yet."
- Leaving the editor waits for the save. If saving takes more than about 10 seconds, you stay in the editor and see a message that your changes are still open.
- Pressing ⌘ S (Ctrl S) only reminds you that changes are saved automatically.
Each visit in which you make changes also leaves an autosave version in History, so you can go back to how the resume looked before. Within a visit, press ⌘ Z (Ctrl Z) while you're not typing in a field to undo your last change, and ⇧ ⌘ Z (Ctrl Y) to redo it. There's no undo button in the editor bar. See Undoing changes and version history.
Editing in more than one place
If the same resume changes somewhere else while you have it open (in another browser tab, on another device, or through an AI agent or app connected to your account), the editor picks up the change on its own and shows a short message: "Synced changes made in another tab." or "This resume was updated by an AI agent."
- If you're typing in a field at that moment, the update waits until you leave the field, so your typing isn't interrupted.
- If you have changes of your own that haven't been saved yet, your changes win.
- After an outside change, ⌘ Z can't undo past it. Use History to go further back.
Locking a resume
Lock a resume when it's finished, or when you've sent it for an application and want to keep it exactly as it was. You can still view, download, print and duplicate a locked resume, and a public link you already made keeps working, but the content and design can't change.
Open the document menu
Select the document name in the editor bar.Select Lock editing
The resume locks straight away. There's no confirmation, because unlocking is one click. A lock icon appears next to the document name.
While a resume is locked:
- The Write panel shows Locked. Unlock to edit. and every field is read-only.
- The Design panel is read-only.
- Rename… and Move to Trash are unavailable in the document menu.
- Share link settings can't be changed, and History can't restore an older version over it.
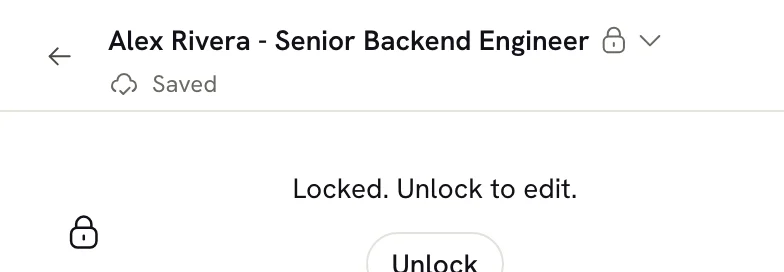
To edit it again, select Unlock in the notice, or choose Unlock editing from the document menu.
You can also lock and unlock resumes from the Documents page. See Managing documents.
Related guides
- Filling in your details: your name, contact details, photo and summary.
- Formatting text: bold, lists, links and the formatting toolbar.
- Editing on a phone or tablet: how the editor changes on smaller screens.
- Keyboard shortcuts: every shortcut in one list.
- Exporting your resume: PDF, Word, Markdown and JSON.
Importing a resume
Turn an existing resume into an editable Hireway document from a PDF, Word file, LinkedIn export, JSON Resume or Hireway JSON file.
Filling in your details
Add your name, headline, contact details, extra links, photo and summary to a Hireway using the Basics card and the Summary section.