

Arranging the layout
Move the sidebar left or right, change its width, move sections between columns and pages, split sections into columns, and control page breaks.
Every resume has a layout: a list of pages, and on each page a main column and a sidebar. This guide shows how to change the sidebar, move sections between columns and pages, show a section's entries in several columns, and decide where pages break.
How the layout works
- Pages. You decide which sections start on which page. If a page's sections don't fit, the rest runs onto an extra page; see Fitting content on a page.
- Main and sidebar. On a two-column template, the sidebar prints as its own narrow column. On a one-column template, sidebar sections print after the main sections.
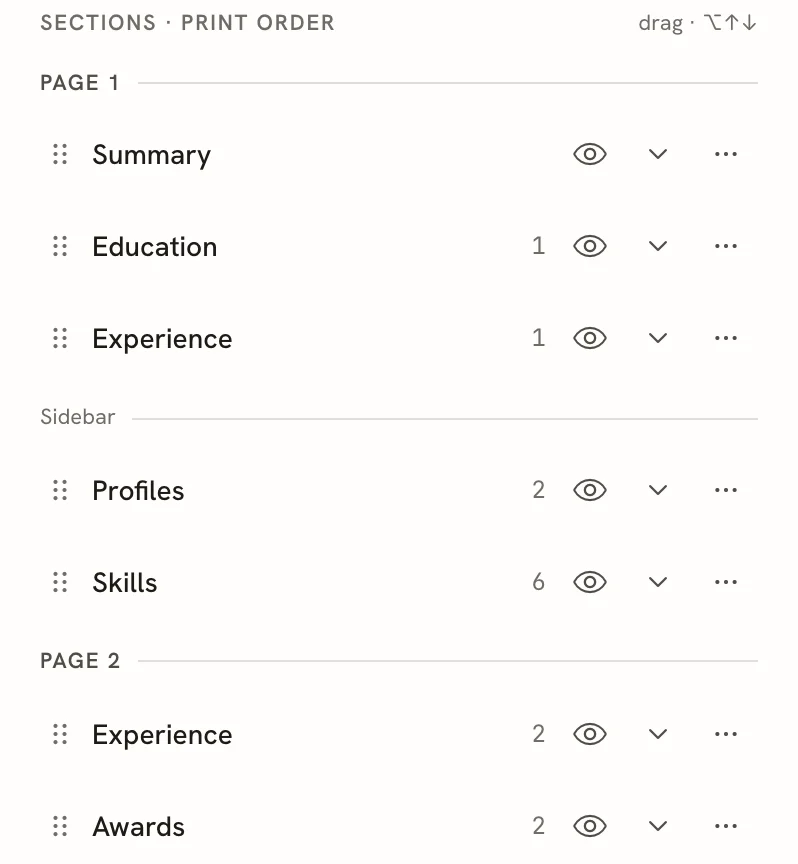
- Print order. In Write, the list of sections shows them in the order they print: page by page, the main column first and then the sidebar. Dividers mark where each page and each sidebar starts.
Move the sidebar and change its width
On a two-column template, a Sidebar panel appears under the template gallery in Design → Template.
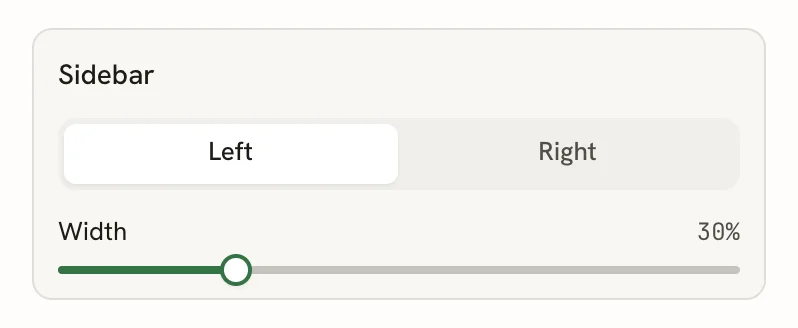
- Left / Right puts the sidebar on that side, whatever the template's usual side is.
- Width sets the sidebar's share of the page, from 10% to 50%.
Sidebar Width in Advanced → Layout uses the same 10% to 50% range.
Reorder sections and move them between columns
In Write:
- Drag a section by its handle (the dotted grip on the left) to a new place in the list. Dragging it below a Sidebar divider moves it into the sidebar; dragging it past a Page divider moves it to that page.
- Or focus a section's title and press ⌥ ↑ or ⌥ ↓ (Alt ↑ or Alt ↓ on Windows and Linux).
- Or open the section's ⋯ menu and select Move up or Move down.
For more on the section menu, see Managing sections.
Manage pages in Advanced → Layout
Advanced → Layout shows every page as a box with its Main and Sidebar columns. Open Advanced at the bottom of the Design panel to find it.
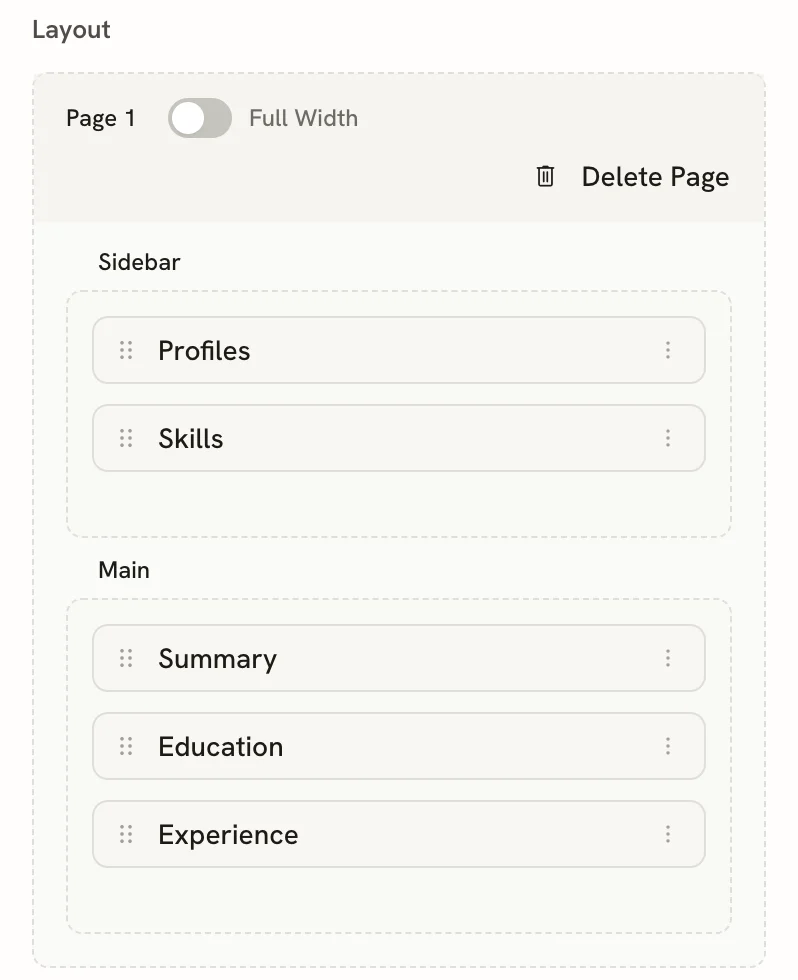
Here you can:
- Drag sections between columns and between pages.
- Select Add Page (below the last page) to add an empty page.
- Select Delete Page to remove a page. Its sections move to the first page (or to the second page, if you delete the first). You can't delete the only page.
- Turn on Full Width to print that page in a single column. Its sidebar sections move into the main column.
Each section also has a ⋮ menu:
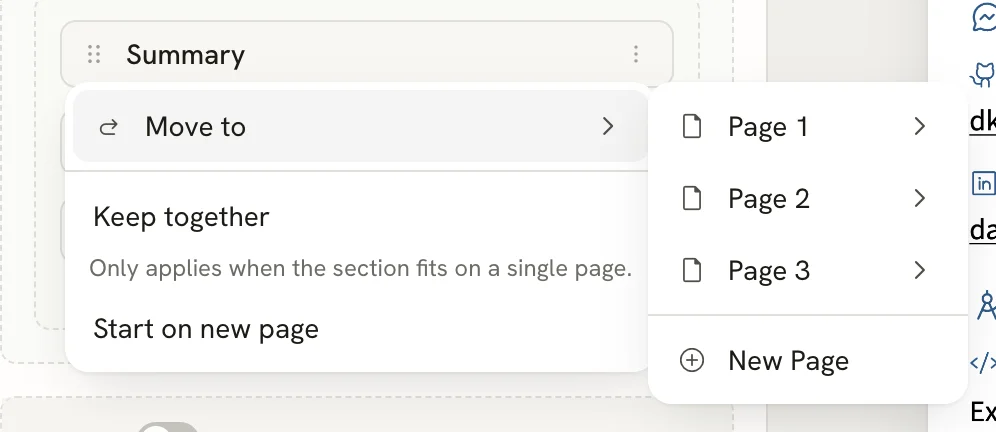
- Move to → a page → Main or Sidebar moves the section there. New Page moves it onto a page of its own at the end. Sidebar isn't offered on full-width pages or with one-column templates.
- Keep together and Start on new page control page breaks, described below.
Show a section's entries in columns
Short entries, such as skills, languages or interests, can sit side by side. In Write, open the section's ⋯ menu, point to Columns and choose 1 column to 6 columns.
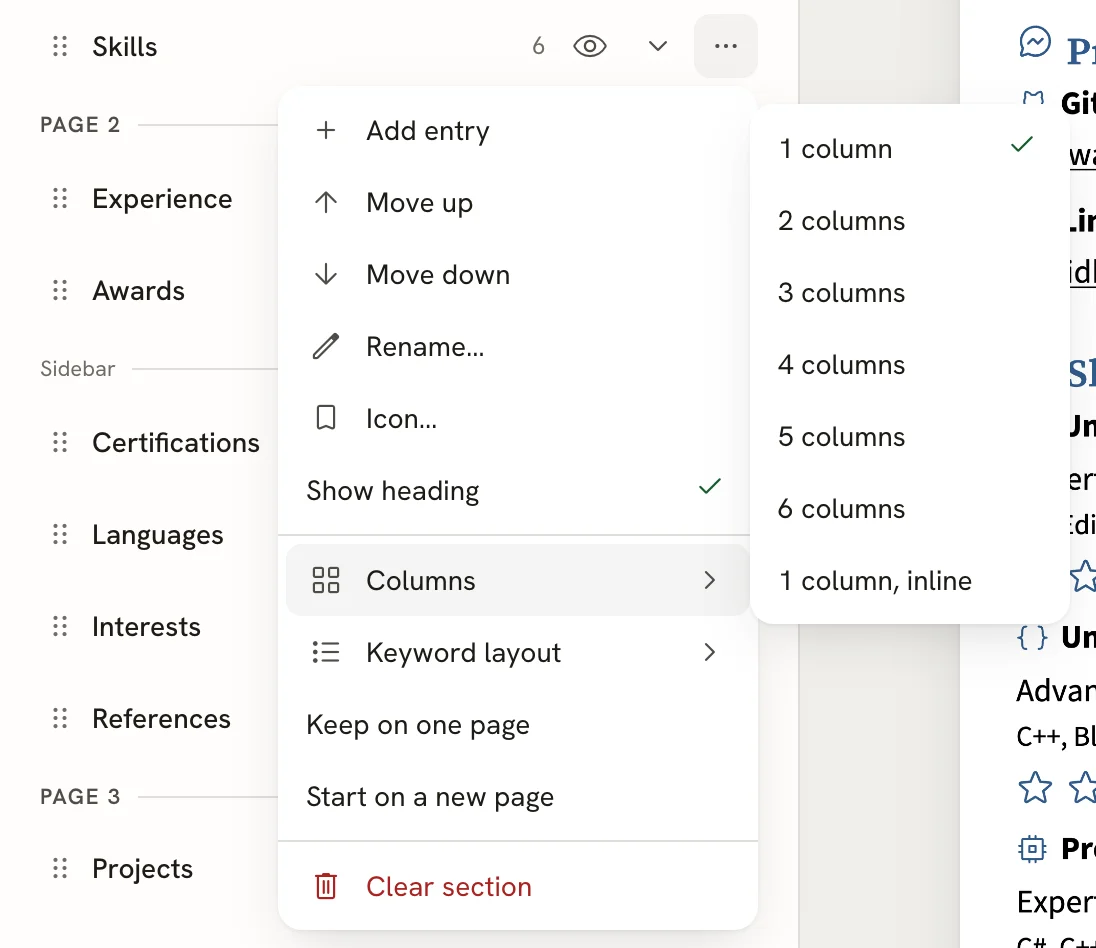
The Skills section has two extra choices:
- 1 column, inline runs skills together on one line instead of stacking them.
- Keyword layout shows each skill's keywords Inline (on one line) or as a Bulleted list.
Control page breaks
Two switches decide how a section behaves at the end of a page. You find them in the section's ⋯ menu in Write and in its ⋮ menu in Advanced → Layout; both places change the same setting.
| In Write | In Advanced → Layout | What it does |
|---|---|---|
| Keep on one page | Keep together | Moves the whole section to the next page instead of splitting it. It only works when the section fits on one page. |
| Start on a new page | Start on new page | Always begins the section at the top of a new page. |
Keeping a section together can leave a large gap at the bottom of the previous page. If that happens, move a shorter section into the gap or turn the switch off.
Related guides
- Choosing a template: one- and two-column templates.
- Managing sections: add, rename, hide and remove sections.
- Fitting content on a page: keep to the pages you planned.
Choosing paper size, margins and language
Set your resume to Letter, A4 or free-form, choose margins, set the language for section titles and dates, and toggle icons and link underlines.
Fitting content on a page
See when your resume runs onto an extra page, fit it back with one click, or tighten text size, density, margins and content yourself.