

Choosing paper size, margins and language
Set your resume to Letter, A4 or free-form, choose margins, set the language for section titles and dates, and toggle icons and link underlines.
The Page group in Design sets up the paper your resume is printed on: its size, its margins, the language of the words Hireway adds for you, and whether contact details show icons and underlined links.
Open the Page group
In the editor, select Design (or press 2), then select Page in the row of links at the top of the panel.
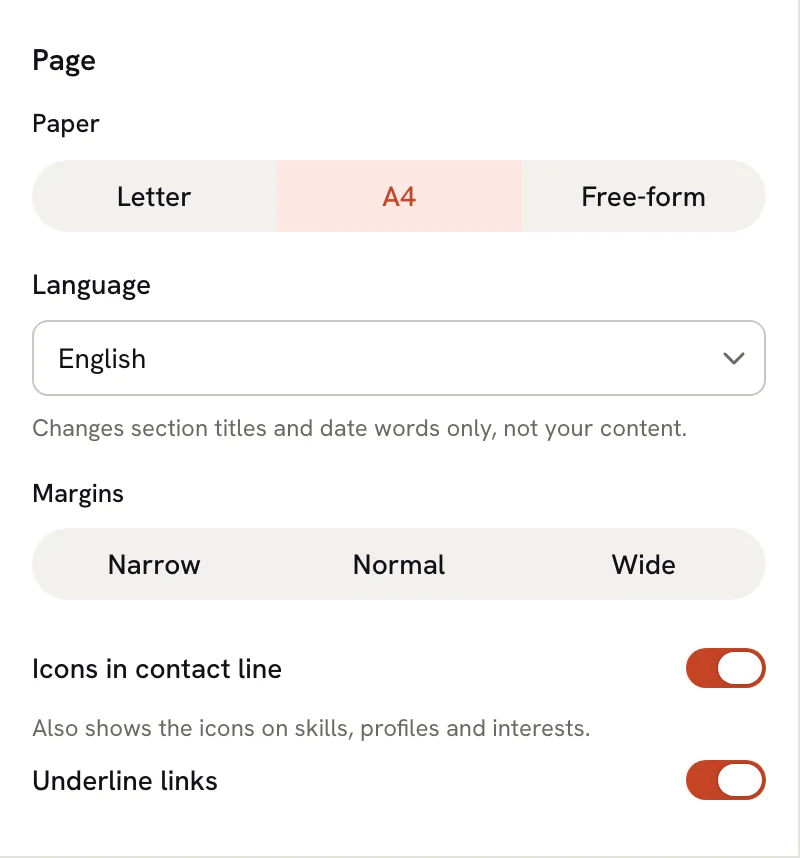
Choose the paper size
Under Paper, select Letter, A4 or Free-form.
| Paper | Size | Use it when |
|---|---|---|
| Letter | 8.5 × 11 in (216 × 279 mm) | You're applying in the United States or Canada. |
| A4 | 210 × 297 mm | You're applying almost anywhere else. |
| Free-form | A4 width, as tall as its content | Your resume is only read on screen. |
Your content keeps its place when you switch. Because Letter is shorter and wider than A4, entries can move between pages, so check the page breaks afterwards.
Free-form: one long page
Free-form is for resumes that are only read on screen. It keeps the A4 width, but each page grows as tall as its content needs, so nothing ever runs onto an extra page. Each page is at least as tall as an A4 page.
A free-form resume prints poorly, because printers cut it into paper-sized pieces wherever it happens to break. Use Letter or A4 if anyone might print it, or if a job asks for a one- or two-page resume.
Set the language
Choose a language under Language. It changes the words Hireway writes for you, such as the default section titles ("Experience", "Education") and date words (month names, "Present"). It doesn't translate what you wrote.
The language also:
- sets the rules Hyphenation uses, if you turn it on in Advanced → Typography;
- mirrors the layout for right-to-left languages such as Arabic and Hebrew, so a left sidebar moves to the right.
To show dates as "Mar 2022", "March 2022", "03/2022" or "2022-03", use Date format in Advanced. See Entering dates.
Choose margins
Under Margins, select Narrow, Normal or Wide. Margins are the white space around the page edges. They also set the gap between a template's columns, below the header and between sections.
| Margins | Left and right | Top and bottom |
|---|---|---|
| Narrow | 10 pt | 8 pt |
| Normal | 14 pt | 12 pt |
| Wide | 19 pt | 16 pt |
If you type exact margins in Advanced that don't match one of these, none of the three is selected.
Show or hide icons and link underlines
- Icons in contact line shows small icons next to your email, phone, location and links. It also controls the icons on skills, profiles and interests.
- Underline links underlines your website and other links on the page.
Exact page settings
Advanced → Page holds the exact values behind the Page group, plus a few extras:
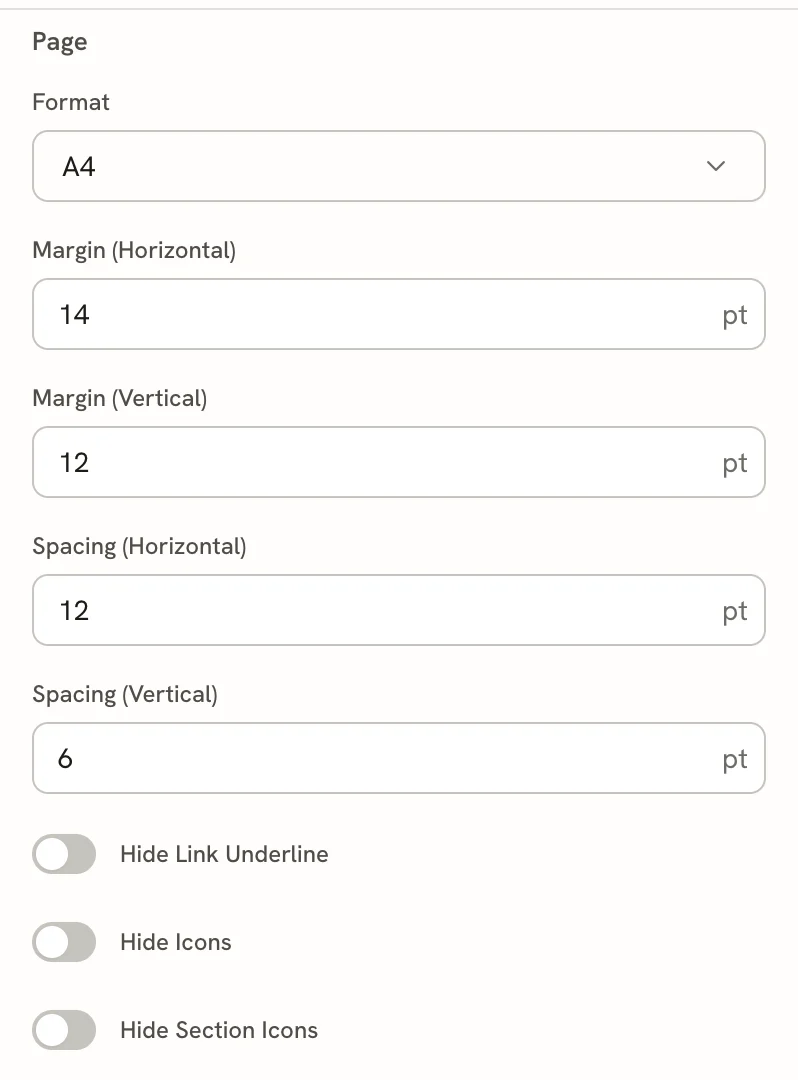
| Setting | What it does |
|---|---|
| Margin (Horizontal) / Margin (Vertical) | Exact margins, from 0 to 100 pt. |
| Spacing (Horizontal) | Space between items that sit side by side, for example in a section shown in several columns. |
| Spacing (Vertical) | Space in and between entries. Density in the Type group sets this too. The space between sections comes from Margin (Vertical). |
| Hide Link Underline | The same as turning off Underline links. |
| Hide Icons | The same as turning off Icons in contact line. |
| Hide Section Icons | Hides the small icon before each section heading. You choose each section's icon from its ⋯ menu in Write, with Icon…. |
Cover letters have the same Page controls in their own Design mode. See Writing a cover letter.
Related guides
- Fitting content on a page: use margins and other settings to stay within your pages.
- Arranging the layout: columns, sidebar and multi-page layouts.
- Exporting your resume: download the PDF in the paper size you chose.
Choosing colors
Pick an accent color for your resume headings and icons, check its contrast, and change the text, background and skill level styles.
Arranging the layout
Move the sidebar left or right, change its width, move sections between columns and pages, split sections into columns, and control page breaks.